| HOME | Software | Lotus Cars | DWARF | Kindle | Solar |
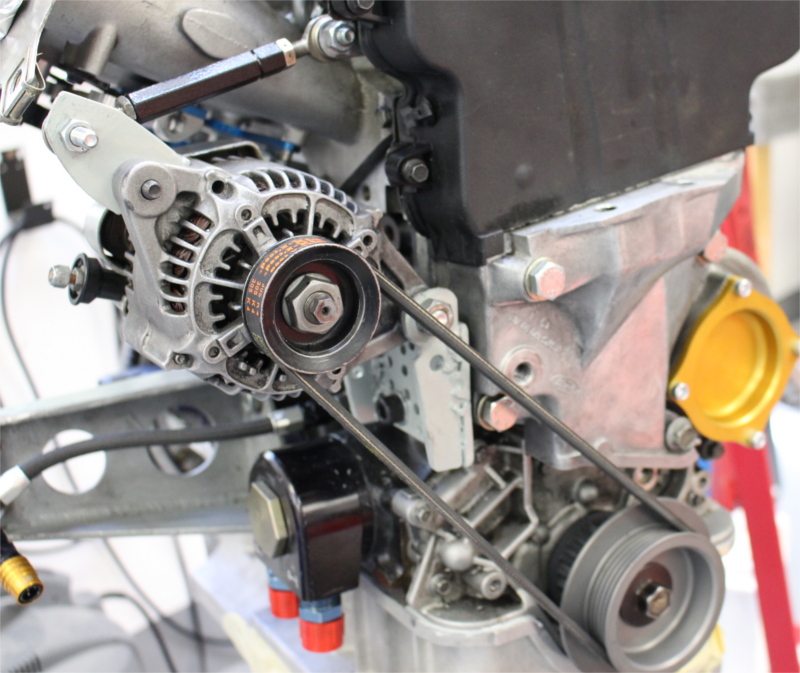
By removing idler pulleys and brackets and the water pump internals I simplified things. Belt went from 55.75 inches to 30.5 inches long. Dropped 3 idler pulleys and bracketry which saved nearly 10 pounds of weight. And a lightweight smaller belt drive wheel on the crankshaft too. The belt is tensioned by the black connector at the upper left. Left and right handed threads so one just twirls the connector once the lock nuts loosened a little.
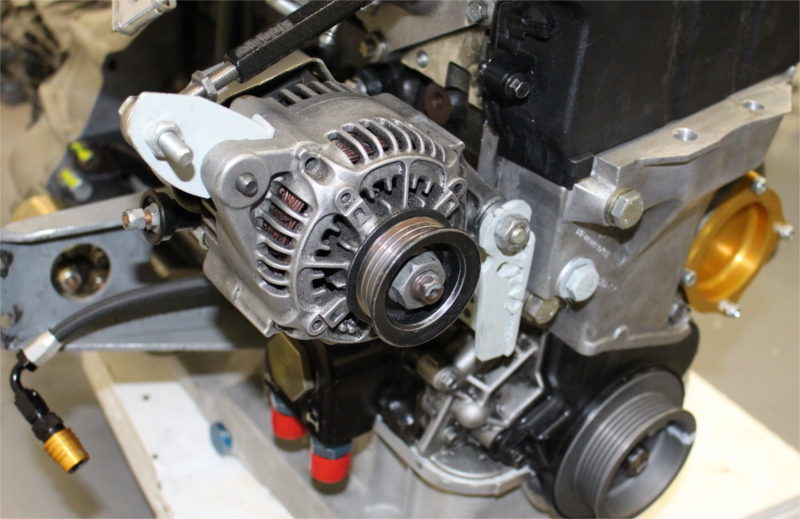
Here is the original alternator belt configuration. (Ignore the blue coolant tubes, those are gone as of 2013.)

Here is the July 2015 version.

The main issue with the alternator was finding one that fit nestled under the intake pipes but was small enough to not touch the frame. A local alternator shop suggested a 50Amp Toyota alternator. It needs a 4 rib belt (I mean the alternator pulley does) so I got a NAPA 25-040551 belt which has, so far, worked fine. The alternator provides plenty of electrical power for this application. The idler and the crankshaft have slots for more ribs (which is probably important if you put a really high amperage alternator on the engine) but I just ignore the extra rib-slots.
The alternator is controlled with 3 wires plus the post (the post is the power output connection). For data on wiring the alternator see the wiring page.
The alternator is fixed in place. The upper bracket is adjustable length. The lower bracket is a simple 1/8 inch thick steel panel (drilled for lightness) which bolts to the engine with a couple panels welded on the panel to provide a place for the alternator bolt to pass thru the alternator lower mount ears.

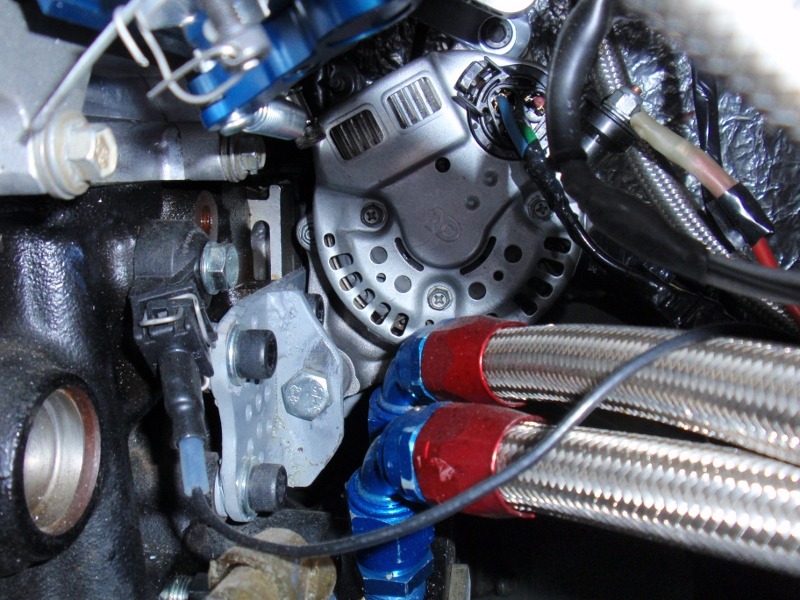
The following shows the back of the alternator and the back of the (pre 2016) lower mount. All rather snug between the intakes (the throttle linkage is blue), the oil lines and the frame (which is not visible).

On the other side of the engine (right side of the upper picture on this page) was (before 2013) a rather large alloy bracket (I do not seem to have the Ford part number for this). I did have to cut the bottom ear off so it would fit, but it is still securely bolted to the block and head. I combined it with a Ford idler and a little Caterham bracket that mounts the Ford bracket to the Ford idler (I don't have the Caterham part number). I do have the alternator idler part number (see part numbers page here). The top picture on this page shows (on the right side of the picture) the idler bolted to the Caterham bracket with 2 Allen screws. The screws from the little Caterham bracket to the Ford bracket casting don't show, but the large Ford bracket shows clearly in the some pictures on this page.

This work is licensed under a
Creative Commons Attribution 4.0 International License.